 Industry News

The Problem
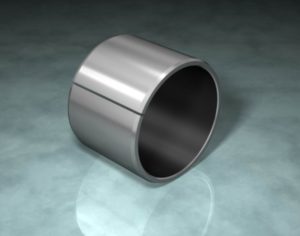
A customer contacted Technymon GBT to resolve a frictional issue occurring on the sliding bearing (MU material). The customer initially identified excessive friction and wear on approximately 10% of the assembled components, which was detected in the field during operation at OEM end. The customer was unable to analyze the root cause instantly. In the meantime, to deliver acceptable components to OEM, the customer started to segregate the acceptable and unacceptable assembled components. This approach resulted in delay and stoppage in their assembly line, which further resulted in an increase of their processing and operating costs.
The customer wanted Technymon to identify the real root cause and provide the solution.
Analysis
The Technymon technical team began by analyzing 50 assemblies provided by the customer. They disassembled the sliding bearings and viewed them under the microscope. The excessive wear in about 10% of the inspected sliding bearings was clearly seen on the PTFE layer, with this excessive wear reaching up to the intermediate layer of bronze.
The team discovered the reason for excessive wear on the PTFE surface was due to extreme contact pressure and flash temperature. The actual contact pressure was exceeding the PTFE layer material bearing limits, leading to a plastic deformation of the bronze surface under the PTFE layer. Scoring and bronze debris could be seen. The metallic bronze debris was causing deep scratches and the PTFE layer was getting destroyed.
Investigation
The deep scratches and excessive wear indicated that failure was originating during the sliding bearing mounting process because the of excessive outer diameter and roughness of the mounting pin. At this point, the team asked the customer to elaborate on their mounting process and to share mounting components designs. After having a detailed discussion and analysis, Technymon convinced all operators at the customer end were using the acceptable mounting procedures and mounting components.
After investigating all factors, it was determined that the problem was related to the assembly tolerance and fits. As such, Technymon measured the sliding bearings available in customer and Technymon GBT stock. Sliding bearings available in stock were meeting the tolerance and specifications completely. Also, 50 pieces of customer shafts and housings were taken and analyzed with the statistical variation.
Each parent component was examined and data recorded to include Cp and Cpk results. Every possible assembly scenario was considered to find the root cause. What stood out the most? The customer was encountering the problem only in 10% of the assemblies.
After detailed theoretical calculations and practical examination, Technymon identified the problem: the excessive wear was occurring when the shaftвҖҷs dimensional tolerance reached the high end of the tolerance limit and the housings, together with sliding bearings, were at the low end of the tolerance limit. In this operating scenario, excessive friction was generated and then converted into the temperature rise of the sliding bearing during actual operation. A thermal expansion on the shaftвҖҷs outer diameter was observed, which further converted the clearance fit into transition fit. As a result, the sliding bearing was experiencing the excessive contact pressure and, therefore, the excessive wear.
After identifying the issue, the technical team advised the customer that the issue could be resolved by changing the sliding bearingвҖҷs internal clearance or shaft outer diameter.
Solution
By changing the thickness correlated to the theoretical calculation and practical examination, Technymon produced 50 sliding bearings with new radial clearance. These sliding bearings were properly identified and numbered.
Before assembly of these dimensionally modified sliding bearings, the customer components (i.e., housings and shafts) were also measured and numbered. The information was recorded to provide a statistical process control, with proper Cp and Cpk values. Additionally, these assemblies were tracked. Initial operational movement and testing at customer ends indicated the presence of radial clearance fit between the shaft outer diameter and sliding bearing internal diameter.
Over the next several weeks, the customer monitored the assembliesвҖҷ performance and recorded results. Ultimately, the data proved that the modified assembliesвҖҷ higher radial clearance eliminated the excessive friction and wear.
With the root cause and solution identified, Technymon GBT changed the sliding bearing thickness. Both parties were then able to update the sliding bearing drawing to procure the dimensionally modified sliding bearings for all future supplies.